
If you're a podcaster, musician, or simply need to be understood in online conferences, your microphone is your most vital tool. Yet how do you know it's doing its best? Testing your microphone is about more than seeing if it's "on." It's about discovering its unique characteristics to achieve the best sound.
This tutorial will walk you through the key steps to check your microphone's quality. We'll go through everything from quick tests to the techniques professionals use. This will ensure your voice is always crisp and clear.

Getting Started: The Basic Checks
Begin with the basics before you try more advanced tests. These steps will rule out the most common audio problems. They also give you a baseline to compare how your microphone is doing.
1. Physical Inspection and Connection
As a preliminary step, do a quick visual check. Look for damage on the body of the microphone. Check the cable for broken or weak spots. Ensure that the connectors are clean and properly plugged in. If you are using a USB microphone, try a different USB port to see if the problem is with the port. Some microphones, like condenser microphones, need an external power source (48V phantom power). For these, make sure power is enabled and working properly.
2. System Sound Settings
Next, check your computer's settings. Both Windows and macOS have tools to check your microphone.
- On Windows: Go to Settings > System > Sound. In the 'Input' section, you should see your microphone. Choose it, and when you talk, a volume bar should move. This shows the mic is picking up sound.
- On macOS: Open System Settings > Sound. Go to the 'Input' tab and pick your microphone from the list. The input level bar will move when you talk if the microphone is working.
This is also a good time to make sure your web browser is allowed to use your microphone, because privacy settings can sometimes block it.
3. Using an Online Mic Test
For a very fast and easy check, you can use an online microphone test. Websites like OnlineMicTest or Restream's Mic Test show you your audio as a moving line. Just click the test button, let the browser use your mic, and start talking. If the line on the screen moves with your voice, then you know your microphone is working.

The Core of Quality: The Listening Test
After you know your mic is working, it is time to check the sound quality. This is the most important part of the test because technical numbers don't tell the whole story. Your own ears are the best judge.
1. Setting Up Your Recording Environment
Find a quiet room to reduce background sound. Small noises can get in the way of your test and give you a wrong idea of your microphone's quality. If you can, use a room with soft things like carpets, curtains, or blankets to stop echo. Turn off fans, air conditioners, or anything else that makes noise. The main goal is to record only your voice.
2. Recording a Clean Audio Sample
Use a program made for recording audio. A good choice is a Digital Audio Workstation (DAW) like Audacity, which is free and has many features, or GarageBand. Before you record, change a few settings to get a clean sound. If you use an audio interface or mixer, set any equalizer (EQ) dials to the middle or "flat" setting. Also, turn off any effects like compression.
Sit a normal distance from the microphone. A good rule is about one hand-length away. Record yourself talking for about 30 seconds. To test the microphone well, change how loud you talk. Try talking softly, then at a normal level, and then a little louder.
3. Critical Listening and Analysis
Now, listen to your recording. For the best results, use good headphones or speakers that give you a true, flat sound. When you listen, think about these key things:
- Clarity and Detail: Is your voice clear and easy to understand? A good microphone will pick up the small details in your voice and not sound muffled or far away.
- Background Noise (Self-Noise): Listen to the quiet parts of your recording. Do you hear a soft hiss or hum? This is the microphone's "self-noise." A good mic will have very little self-noise, so you get a clean and quiet recording.
- Distortion: When you spoke louder, did the audio sound fuzzy or broken? This could mean the microphone cannot handle loud sounds, or your input level was turned up too high.
- Plosives and Sibilance: Listen for hard "p" and "b" sounds and sharp "s" sounds. A pop filter can help with the "p" and "b" sounds, but a good microphone should handle them pretty well by itself.
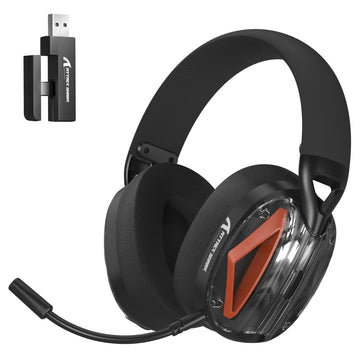
When testing with headphones, using quality monitoring headphones will give you the most accurate representation of your microphone's performance. For critical listening, the difference between stereo and surround sound technologies can significantly impact how you perceive audio details – similar to how gamers need to understand these differences for optimal gaming experiences.

Three Advanced Testing Techniques for the Pros
In case you wish to know even more about your microphone, there are some advanced tests you can perform. They can reveal to you precisely how it functions and make you aware of what to anticipate under varied circumstances.
1. Testing Frequency Response
Frequency response refers to how a microphone records various sounds, from low bass to high treble. Companies provide you with charts, but it is nice to test it for yourself. You can utilize software such as Room EQ Wizard to create test sounds that sweep from low to high. Record these test sounds using your microphone and utilize a tool to analyze the results. A "flat" result indicates that the microphone records sound exactly as it is. But if there are high or low areas, then it indicates that the mic alters the sound slightly.
2. Checking the Polar Pattern
A microphone's polar pattern shows where it's recording sound from—the front, sides, or back. To experiment with this, record yourself talking and walk around the microphone. With a typical cardioid mic, the sound should get noticeably quieter as you move away from the front. The test lets you see how well the mic will reject room noise. It's also very handy for placing the mic in the right spot when you're recording.
3. The Handling Noise Test
Handling noise is the sound that you hear when you touch the mic or the mic stand. To test for this, gently tap or rub the mic and stand while recording. A high-quality microphone will have parts inside that reduce these sounds. This is especially important for singers or anyone who needs to hold or move the mic during a performance.